
I will try to make this as simple as possible for someone trying to move their pool table. I want to first recommend highly that you hire a professional to do this. This information is for those do-it-yourselfers who like to do everything regardless of the outcome. There are several different styles of construction for billiard tables. I won’t list them all but I’ll go over the most common.
Furniture Style Pool Tables
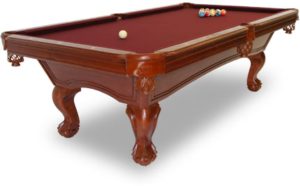
This is the most common style found in homes today. The first thing you’ll do to disassemble this type of pool table is get a staple puller or flat head screw driver and remove the staples holding the pockets up from underneath. (Go ahead and get dirty and lay on your back for this, it will only make things easier. You should be careful of getting things in your eyes. Once you have pulled the staples out of the pocket straps, find the right size socket to pull the bolts out from the underside of the rails. There are usually three per rail. Once the bolts have come out the rails are able to come off. There are usually one of three ways to pull off the rails. 1. Each rail will slide out from the other individually. 2. There will be two horseshoe shaped sets of rails that connect on each of the two side pockets. 3. The rails will be all connected underneath them. You will need help flipping them all over at once. Be carefull because the side pockets could break from the weight as you flip them. Now that you have them upside down you can disconnect all of the pockets for transport.
Now you need to remove the felt from the table top. It will be either stapled or glued, or a combination of both, to the slate bed. If it is stapled you need to go around and remove each staple. A staple puller is easiest but a flat head and needle nose pliers will work. You might find a staple puller at home depot for less money. If the felt is glued, you can simply pull it off. Be careful of ripping the felt at the pocket areas. Sometimes they are stapled underneath even though they are glued. Now that you have the felt off and folded up, you are home free.
Next, you need to take the slate off the frame of the table. You need to pull the screws out of the top of the slate with a drill that has a screwdriver tip on it. (Usually Philips head) On many occasions you can’t see the screw heads because they are covered with beeswax or plaster. If it is beeswax, simply dig it out with a flat head screwdriver then remove the screws. If it has plaster you should get a carbide drill bit and drill out the plaster, but don’t drill so much that you wear down the head of the screw. Now get a flat head screwdriver and dig out the grooves for the screw head so that you screwdriver bit will fit in it without stripping the head. (Be very careful, I have stripped many of these) The slate should have a screw holding it down on each corner. Sometimes there are some along the center beam of the frame. After you are able to take the slate off, you can put it in your truck or wherever you want. You can stack the slate on top each other in a full size truck and you can safely walk on the slate. Be careful that there aren’t any staples on the bottom of the framed slate because it can scratch the piece of slate underneath it while sliding.
The only other thing to do at this point is take the legs off of the frame of the table. If you are moving the table place the frame, upside down if it will fit on top of the stacked slate in the truck. Now you can place the rails on top of the frame as long as your careful not to let the finish get scratched and can safely secure everything. I hope you have found this blog informative. My next one will be on how to level a pool table. If you want to learn how to recover the rails on a pool table go to the felt installation guide.